Thermoplastic Line Striping: A Complete Guide and FAQs
What is thermoplastic line striping?
Thermoplastic line striping is a form of pavement marking that creates lines and symbols on asphalt so that roads and parking areas can be clearly and safely marked for drivers and pedestrians.
Why Choose Thermoplastic Line Striping?
In comparison to line striping that is done with standard line striping paint, thermoplastic will last much longer before needing to be reapplied. The one exception to this is if thermoplastic is exposed to plow blades, which is common in colder climates. Since thermoplastic is applied in a pretty thick volume, plow blades will typically reduce its lifespan significantly, which is why thermoplastic is less common in colder climates. Thermoplastic line striping is also a very clean way of line striping as nothing is sprayed; material is heated and pushed through a die to allow it to spread onto the asphalt surface.
What is needed to Apply Thermoplastic line striping?
Thermoplastic line striping requires a way to melt thermoplastic media, and once melted, a way to release it onto the surface you’re going to stripe or you can use thermoplastic media that is preformed, which is simply placed on the surface and then heated. Some thermoplastic machines come with a built-in heater that allows you to get the thermoplastic media heated and applied from the same rig. However, these rigs often have limitations on how much media they can prepare, so for higher volumes of thermoplastic work, a premelt kettle is often used. A premelt kettle will heat a large volume of media to be ready for application in a short period of time. Thermoplastic often also requires the surface of the asphalt to be etched to allow for good bonding of the thermoplastic to the road. To etch asphalt, it is common to use a scarifier.
How much thermoplastic media is required for a line?
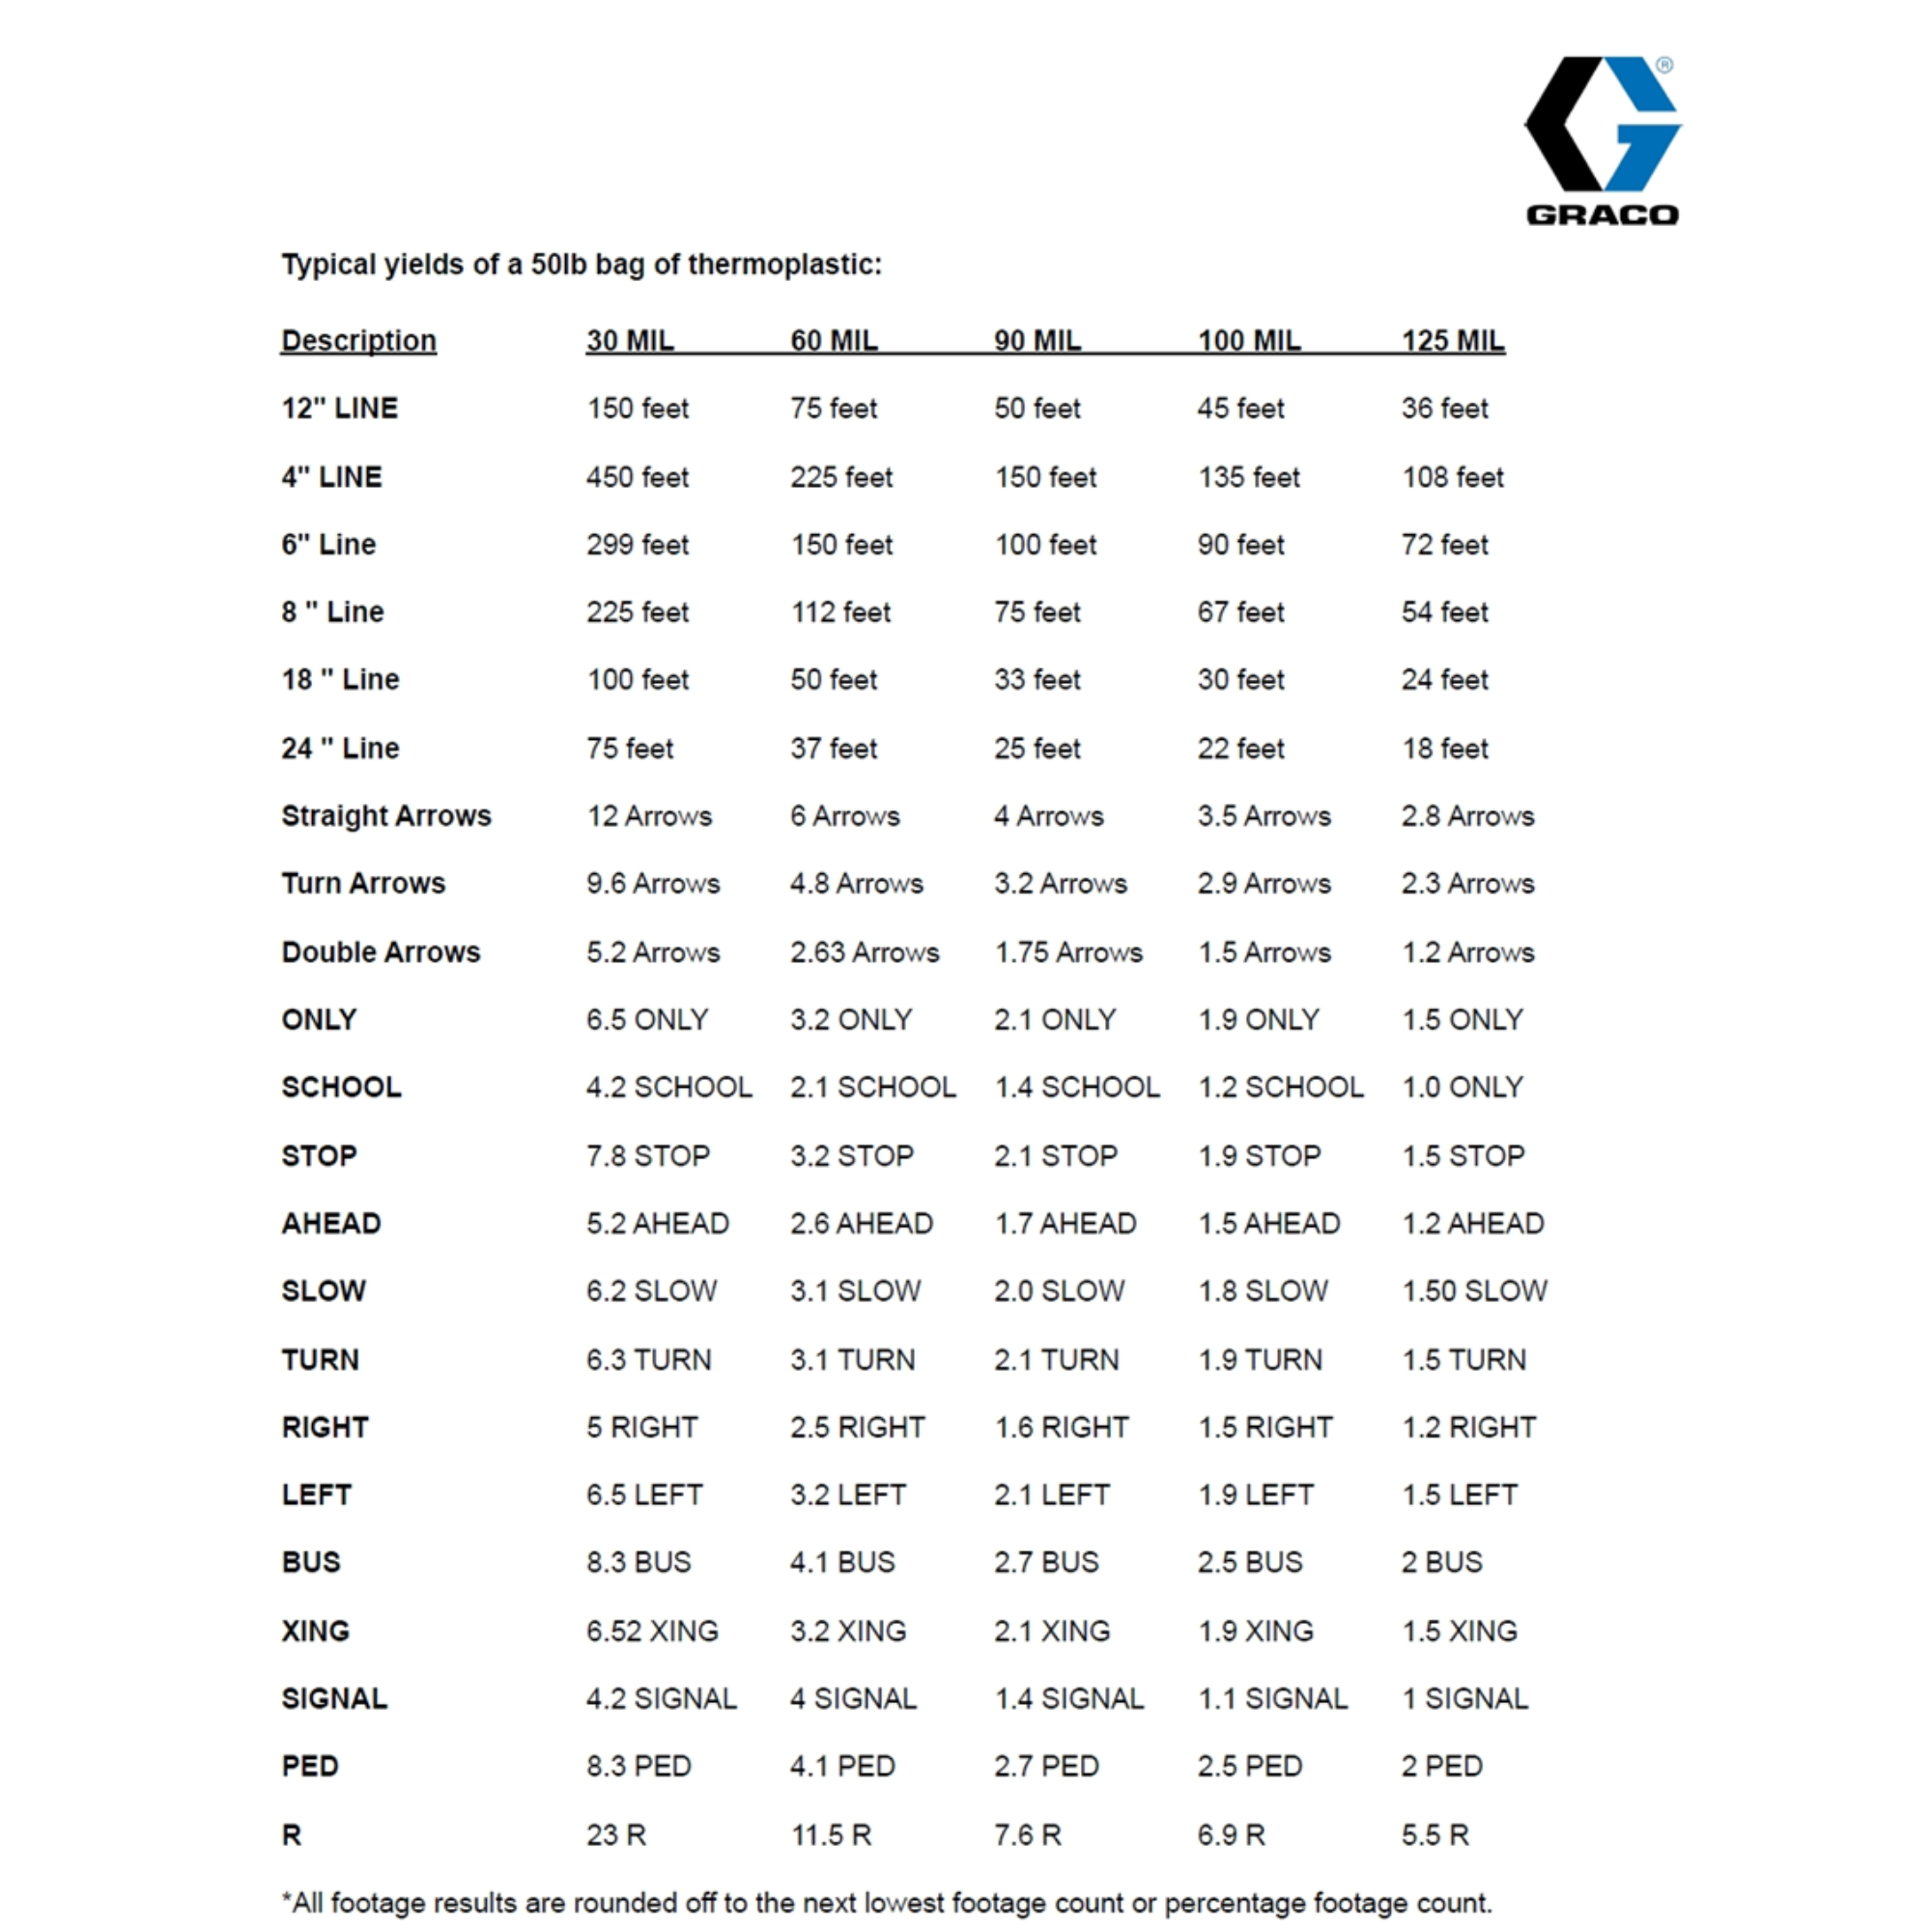
The amount of thermoplastic media you will need to complete a project will depend on the thickness that is requested. Thermoplastic media is applied in mils, and so the higher the mil build that is requested, the more thermoplastic media you will need. The chart below shows approximate thermoplastic media volumes needed for different lengths of lines and different mil builds. You can use this chart to estimate how much thermoplastic you would need for your project.

Steps to applying thermoplastic
As earlier mentioned, to apply thermoplastic, you need a way to heat the media and then apply it to the asphalt in a controlled manner. To apply thermoplastic, you have to light the burner on your pre-melt kettle or your thermoplastic line striper. Thermoplastic media requires time to be able to be prepared for application. Usually, around 1 to 3 hours will be required for the media to be heated up, depending on the outside air temperature and the burner size on your thermoplastic line striper or melt kettle. Once the product is heated, you will want to ensure you have a die set that is appropriate for your project on your thermoplastic line striper. Unlike traditional line striping where it is easy to change line sizes by simply changing your line striping tip, thermoplastic line striping uses a die that takes a bit of time to change. So you will want to have the die set up on the thermoplastic striper before you begin heating the material to apply. Once the material is heated and the die set is ready, you can begin applying thermo. Most thermoplastic line stripers have a gate that allows you to control the thermoplastic release rate which allows you to control how much you apply. Initially, you will need to settle into an application speed and volume of thermo through trial and error. Once you have completed applying the thermoplastic media you wanted, you can run the remaining thermo through your thermoplastic line striper. There will almost always be some thermo left in the striper which is ok; when you go to do another job, the thermo will melt down again for the next project.
For some thermo applications (like applying words to asphalt) using preformed thermo can save time and help ensure the best results. Preformed thermo comes prepackaged in the letters or shapes you need, not in a bead format but in a solid format. You then lay the preformed thermo on the ground and use a torch to etch it in.
A few additional notes on thermoplastic application
Thermoplastic media manufacturers have specifications of the surface temp of the road when thermo is applied. Thermo etches into asphalt; so to be applied correctly, the asphalt should not be too cold. Additionally, the outside temperature should not be too cold, as this will prevent or prolong the thermo from getting warm enough or applying properly. It is best to check with the thermoplastic manufacturer to see what outside and asphalt surface temperatures are recommended. If thermoplastic is going to be used on Portland cement concrete, a primer-type material is typically recommended. In general, when using thermoplastic each thermoplastic line striper should be used with only one color of thermoplastic media or if you decide to use multiple colors with a single striper, you will want to ensure your thermoplastic line striper has a removable hopper so that you can easily remove the majority of the leftover thermoplastic when changing colors.
Cons to Thermoplastic Line Striping
Thermoplastic line striping is usually more expensive overall than spraying standard line striping paint. However, it also will last much longer, particularly if the thermo doesn’t experience heavy abrasion with plow truck blades.
Thermoplastic tends to be slower to apply than liquid paint when using push behind stripers like those we show below. The equipment to apply thermoplastic will also tend to be more expensive than liquid paint line stripers.
Finally, controlling the amount and design of thermoplastic applied tends to be a bit less precise than liquid paint line striping.
Equipment options for thermoplastic media application
As earlier mentioned, applying thermoplastic has two steps: first, prepare the media, then squeeze it through the die onto the surface. Below are the equipment for both prepping media only (melt kettles) and for prepping/ applying the thermoplastic (line stripers plus kettle).
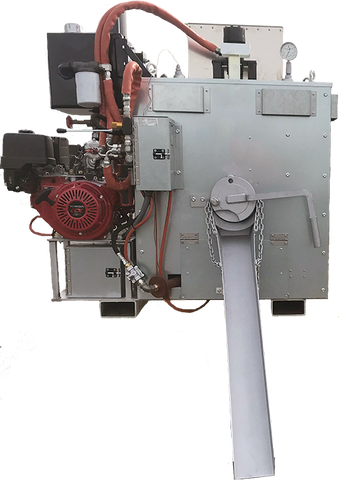
Fastmelt 650 Kettle
This is a premelt kettle that allows you to quickly prep a bulk volume of thermoplastic beads. You will typically still need an hour or more for a full load to be prepped but it will prep 650 pounds of thermoplastic media rapidly.
Prep and Apply in One Thermo Line Stripers
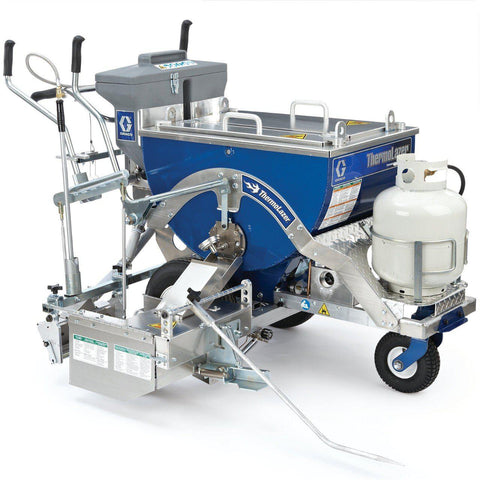
The 200 TC Thermolazer holds 200 pounds of thermoplastic. It has a built-in heater that can heat the 200 pounds of thermoplastic in about 2.5 hours. The Thermolazer 200 TC unit has a hopper that can be removed in the field and so is a good Thermoplastic line striper if you want to be able to do two colors with a single rig. The downside is that it is not compatible with a line driver which means it will be suitable for smaller projects only.
The 300 has the same burner as the 200 TC but a slightly larger Kettle (300 pounds). However, the 300 doesn’t allow for a quick change over of the kettle in the field, so it can really only be used with a single color. The longer heat time of about 4.5 hours for a full kettle is also a bit more time-consuming; however, if you only use 200 pounds of thermo with the rig, it will have a similar heat time to the 200 TC. The 300 TC is also compatible with a line driver making it suitable for longer lines that would be tedious to manually work.
The Thermolazer Promelt is the most efficient Graco thermoplastic line striper. It can prep 300 pounds of thermo in about 1.5 hours, making it about the same speed but with less volume as a melt kettle. If you are doing small- to mid-size projects and want efficiency but one piece of equipment, this is the rig to go with. The Promelt is also compatible with a line driver which allows you to do larger areas efficiently.
A line driver is a motor on wheels that allows you to easily cover larger areas with a thermoplastic line striper. A line driver is best for small- to medium-size projects; for larger projects, people go with Thermoplastic trucks.
Thermoplastic Trucks
For highways and large areas that will use thermoplastic, a Thermoplastic line striping truck is what is used. These are made by companies like Hog or MB Companies.
Overview
Thermoplastic is an efficient long-lasting pavement marking that can last for years. To be applied, it requires asphalt that is at a proper temperature and is best used when it won’t be disturbed by plow blades or scraping. Applying Thermoplastic requires a way to heat the thermo. When done properly, you will have a tremendous road marking that will last for years.


